Prelab
Using the example code Example05_I2C, I was able to locate the I2C sensor address of the ToF sensor, which was 0x29. 0x29 is the expected address due to the one extra bit at the front labeled “ACK.” 0x29 in binary is 0b101001. So we have to shift everything to the left by 1 bit which gives 0b1010010 which in hexadecimal is 0x52, the expected address.

There are two approaches to using two ToF sensors. One approach is to change the address of one of them so that the two sensors send data to two different addresses on the Artemis board. A second approach is to have only one of them on at any given time and hence only using one sensor at a time.
As for the placement of the sensors on the actual robot car, I plan to attach one of the ToF sensors at the front of the robot and one at the side of the robot. This means that the robot will not have ToF sensors on one of its sides and at the back. So it will miss obstacles on whichever sides it doesn’t have a ToF sensor on.
Here's a wiring diagram I used for this lab.

Note: XSHUT was also connected to the Artemis pins to enable shutting off of the sensors.
Lab Tasks
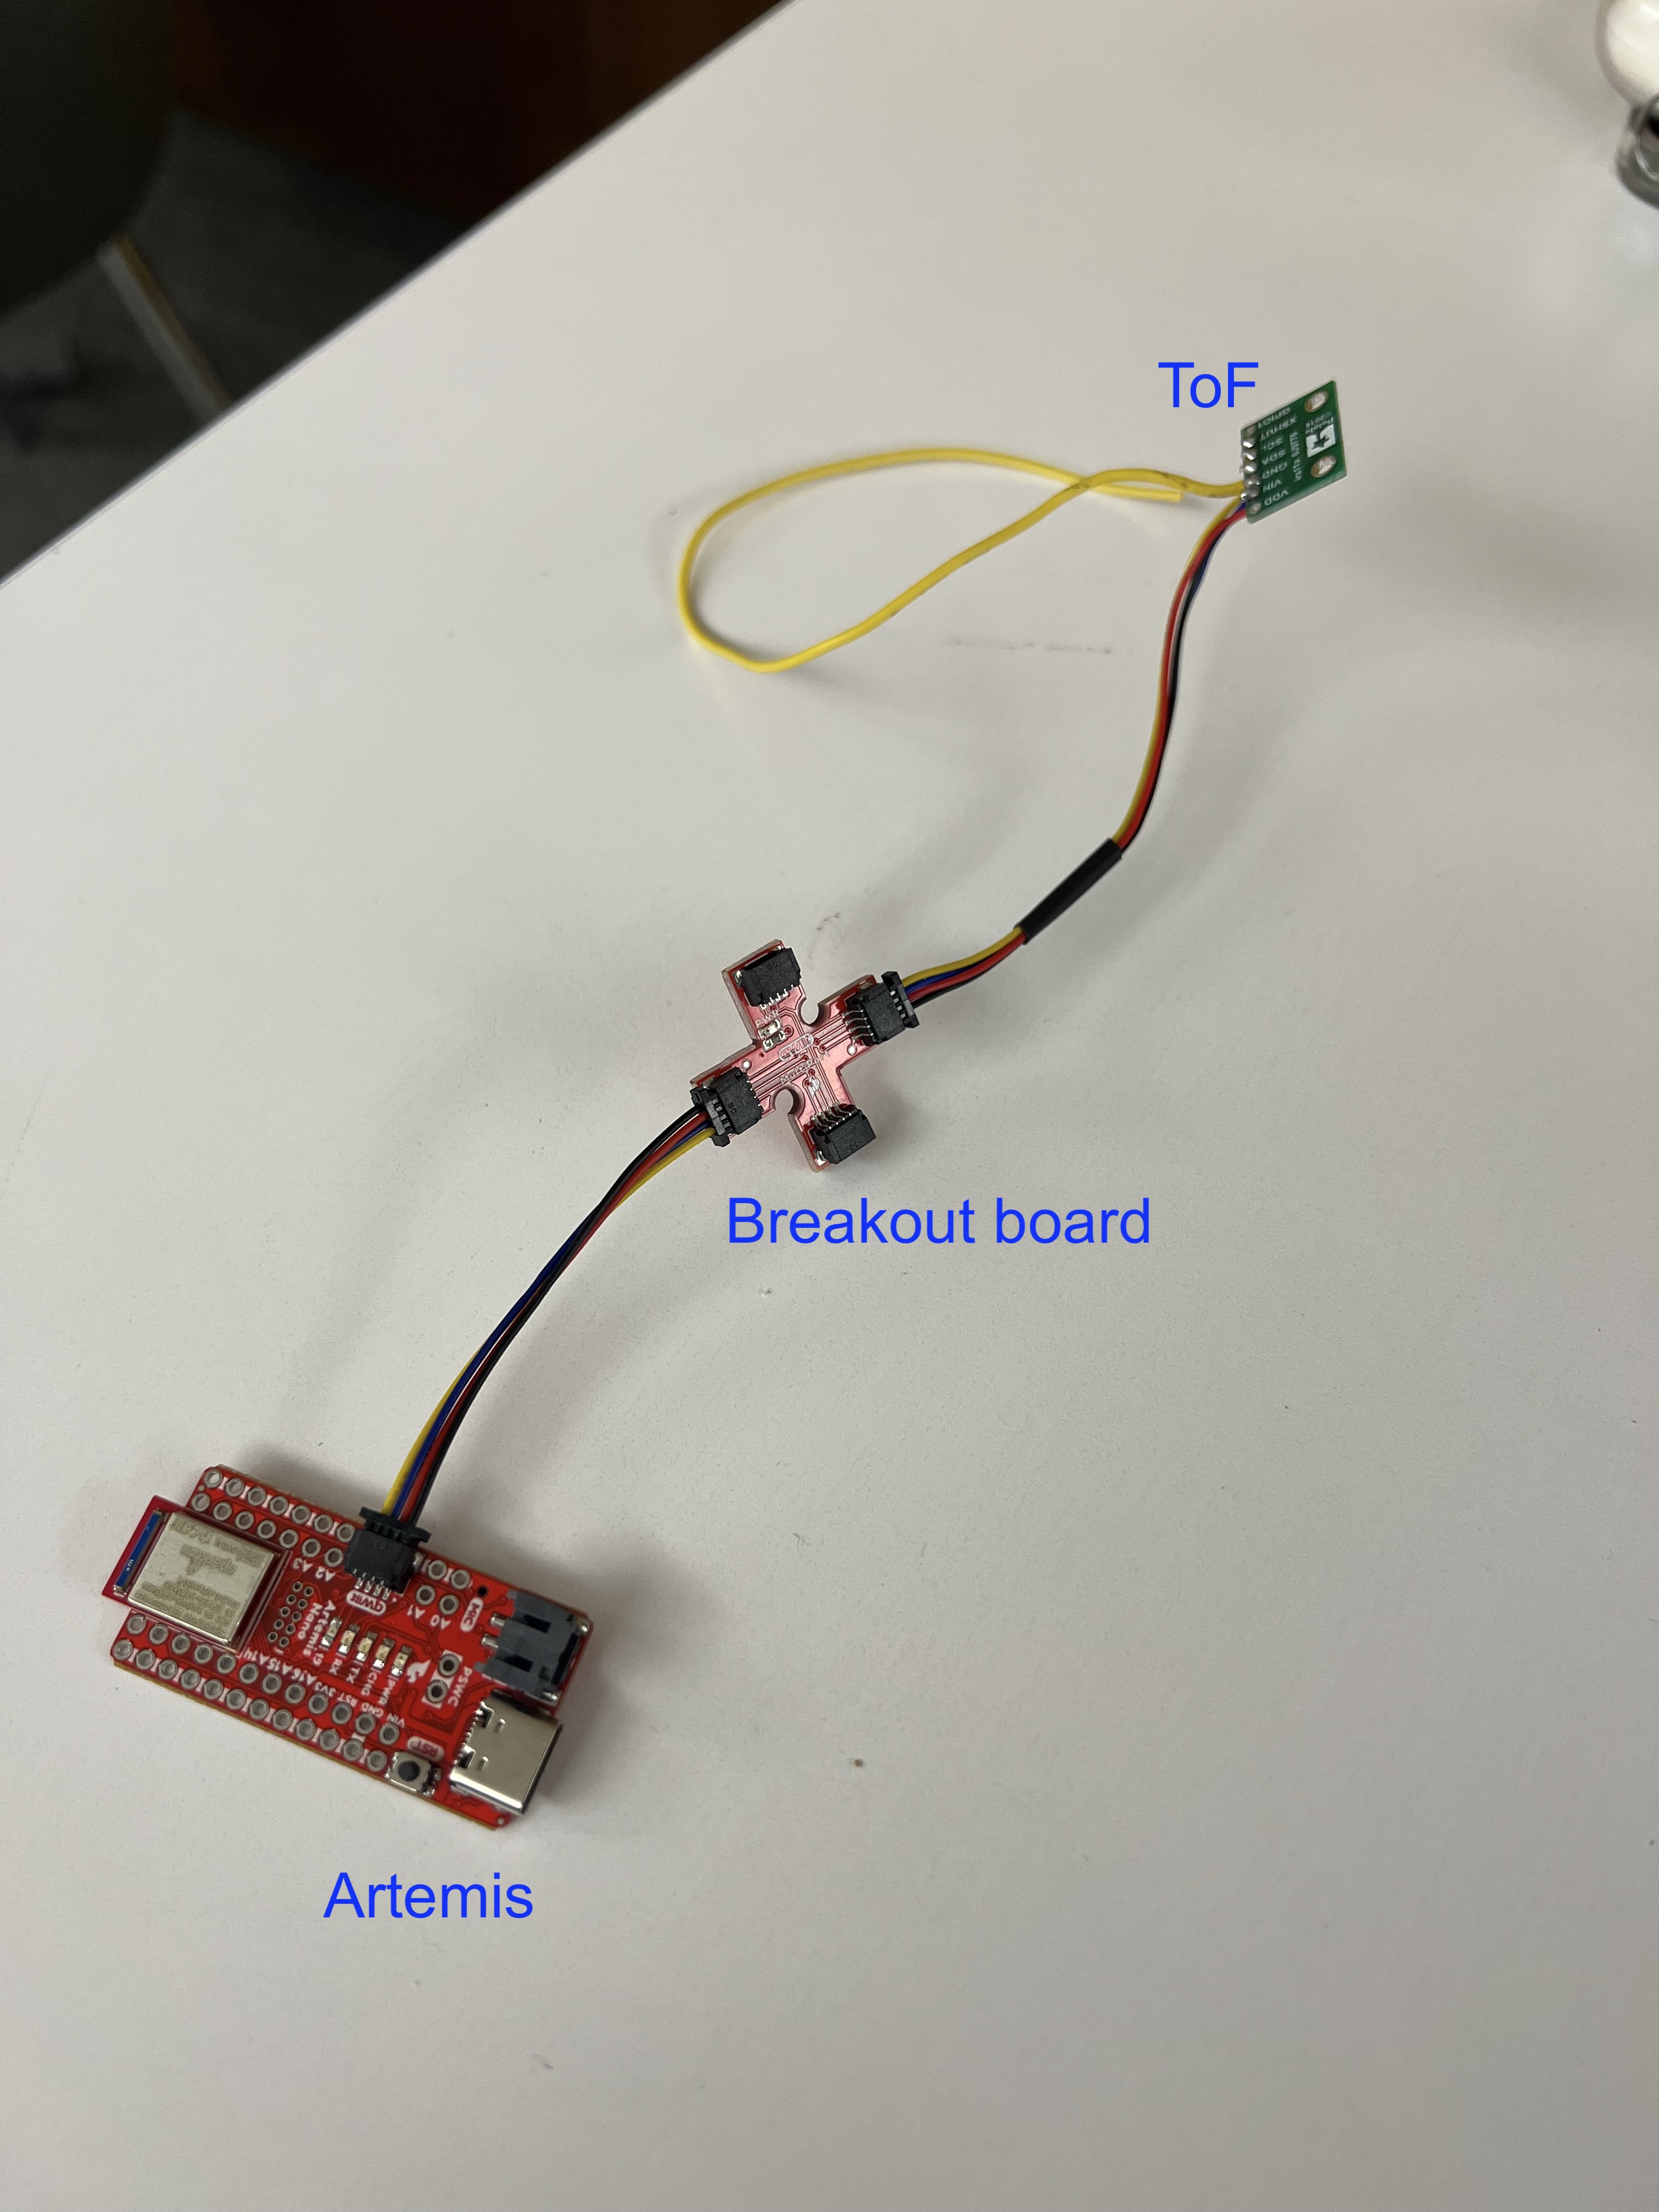
First, I physically connected the ToF sensor to the Artemis board using an I2C cable and a breakout board. Here is a picture of the ToF sensor plugged into the I2C breakout board:
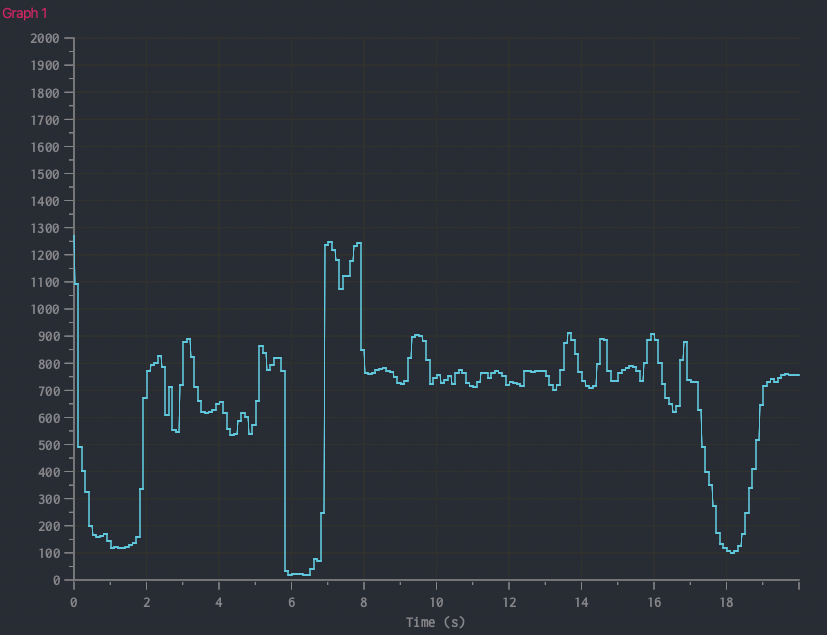
The ToF sensor has 3 modes that it can operate in: short, medium, and long. In short mode, the ToF sensor can detect up to 136 cm in the dark and up to 135 cm in bright lighting. In medium mode, it can detect up to 290 cm in the dark and up to 76 cm in bright lighting. In long mode, it can detect up to 360 cm in the dark and up to 73 cm in bright lighting. To set the mode of the sensor (short, medium, or long), I ran the code Example2_SetDistanceMode with distanceSensor.setDistanceModeShort() as the chosen mode. Then I ran the code Example1_ReadDistance for the sensor to start taking measurement. The following is a plot of the sensor data I obtained.
Next, to assess the ToF sensor's accuracy, I devised the following setup.
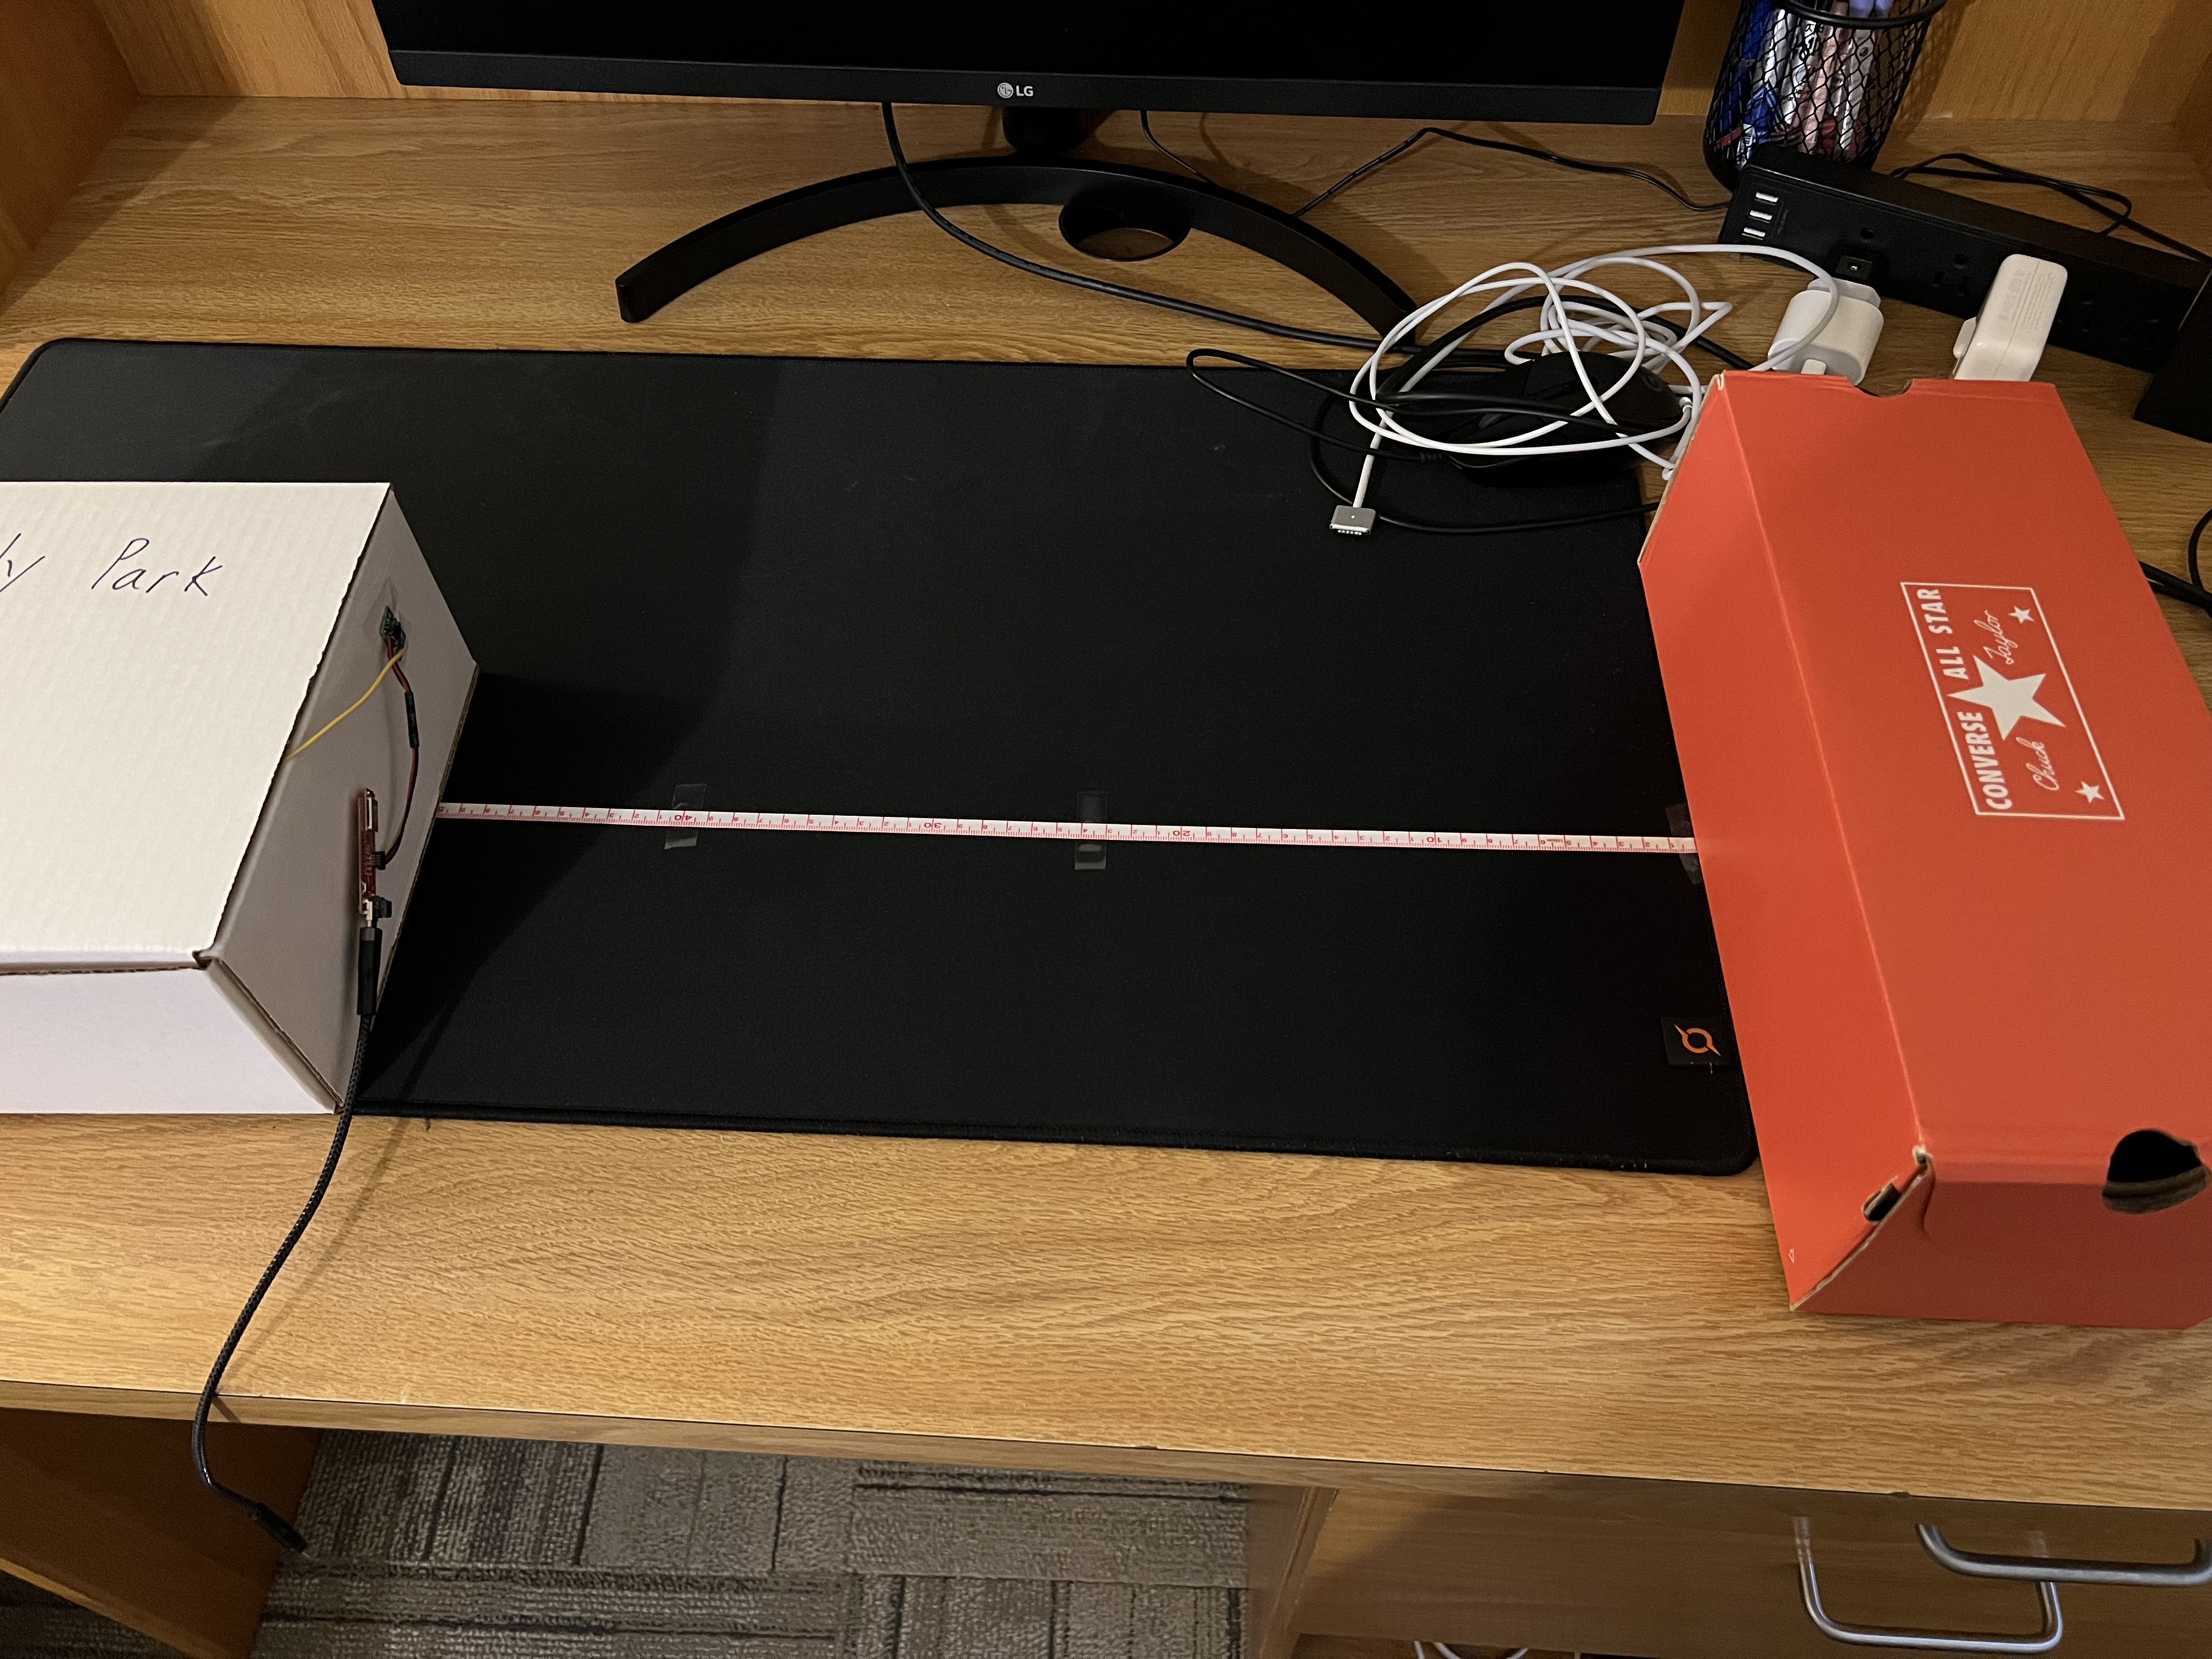
I measured the sensor data at a distance 600mm, 500mm, 400mm, 300mm, 200mm, 100mm, 50mm from the orange box. I plotted the measured sensor data versus the actual distance using MATLAB:

The orange line represents the ideal sensor. You can see that as the distance we’re measuring gets greater, the actual sensor deviates more and more from the ideal sensor.
Next, I connected a second ToF sensor to the Artemis board. To get the Artemis board to receive sensor data from both sensors simultaneously, I changed the address of one of the two sensors (the other sensor just uses the default address, 0x52). Here is the code that changes the address of one of the sensors.
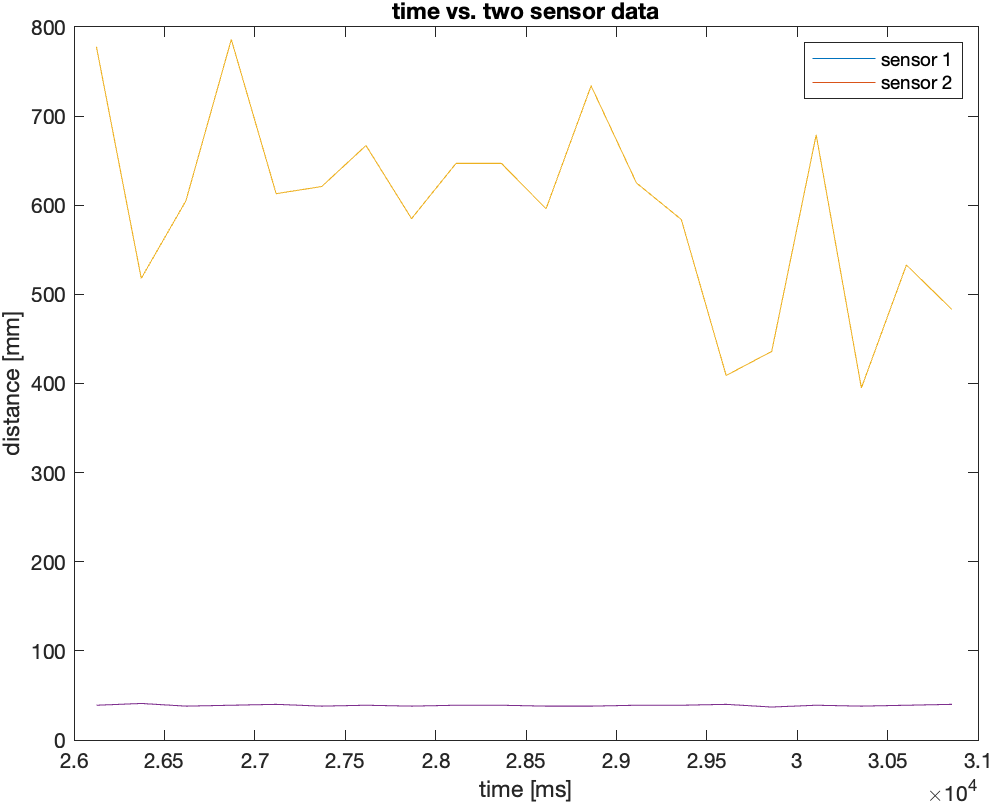
To change the address of one of the sensors, one of the sensors must be off. To turn a sensor off, I had to make use of the shutdown pins on the sensors. I connected the XSHUT pins on the sensors to pins 8 and 9 on the Artemis board — setting the XSHUT pin high turns the sensor off. Then distanceSensor2.setI2CAddress(32) changes the address of whichever sensor is turned on to 32. Here is a plot of the two sensors working in parallel, measuring two different distances.
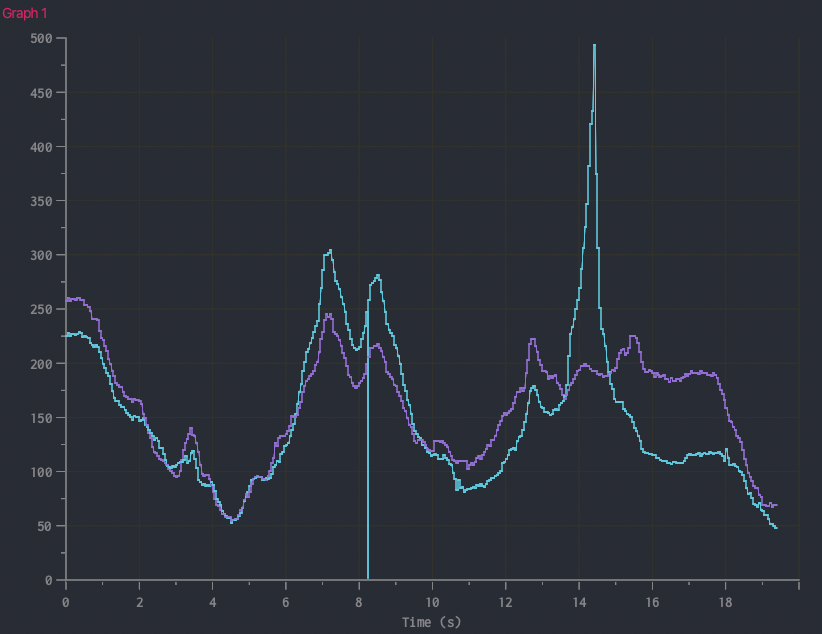
One downside of the code in Example1_ReadDistance is that it’s stuck in a while loop unable to do anything (i.e. can't run any code) until sensor data is available. This is inefficient because the Artemis board could be running other code while it waits for sensor data to be ready and available. To run other code while the sensor measures distance data, I used an if statement to only print the sensor data when it’s available using distanceSensor.checkForDataReady() (which returns 1 only if the sensor data is ready).
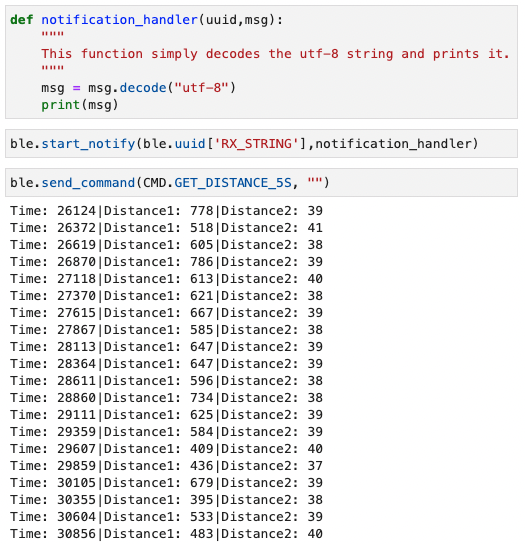
The final task for this lab was to send the timestamped distance data to my laptop via Bluetooth. This task uses what I learned in lab 2 to allow communication between the Artemis board and my laptop. Here’s the Arduino code (written in ble_arduino.ino) that achieves this task.
I tested this code using Jupyter notebook and confirmed that it successfully sends 5 seconds of distance data to my laptop.
The following is this data plotted using MATLAB.
